SharePoint: Displaying A Folder's MetaData Above a List
Yesterday afternoon I rose out of my chair, punched the air and exclaimed "Yes, you f*cker". Had I won the lottery or landed a huge new project that would solve all my money worries for years to come? No. I'd worked out how to get a SharePoint folder to display some metadata on a page!
The Problem
Imagine a basic SharePoint List, like this one:
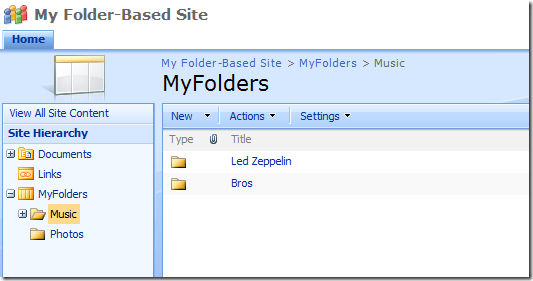
On the right-hand side is a View of the List of Folders in which I'm keeping my music.
What if I wanted to add some additional information about the folder just above where the View appears, like this:
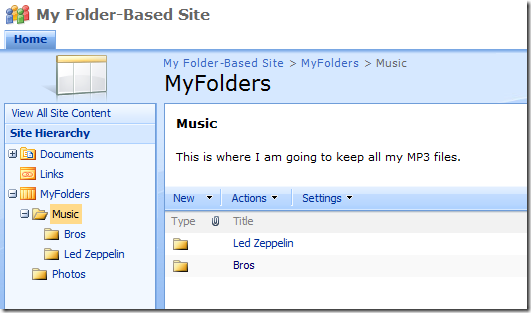
Surely that would be really simple, no?
No!
It took me two days to work out how to do that. Now, admittedly, I'm a noob to SharePoint, but, still. Unless I've missed something very obvious then I'm sure you'll agree what I'm about to describe is anything but simple.
The Solution
What I ended up doing is creating a custom Content Type, based on the existing Folder type, but with an extra Column to store the "description" of the folder. Then I created a custom Web Part to stick in above the View and show the description of the current folder.
Here are the steps involved:
Step 1. Create a new Content Type
This new Content Type will be our custom folder. To create it, go to Site Settings from the Site Actions menu and choose "Site content types".
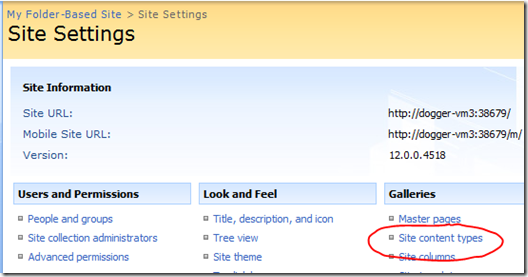
Then click the Create button:

You'll see a form like this:
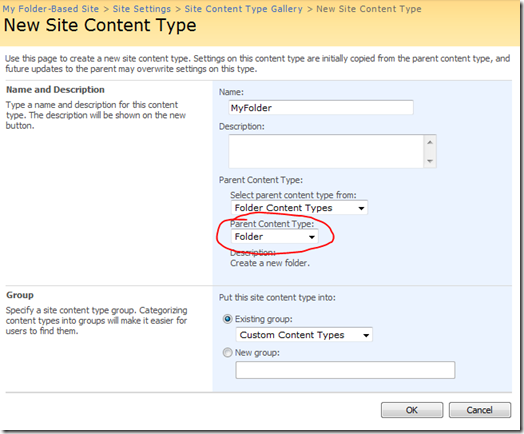
Notice how I've created, in effect, a new type of folder, called MyFolder. As it's based on the existing Folder type it will look and behave just like a normal Folder.
Step 2. Add a Description Field to the New Folder
After creating the new Content Type you should have been taken to a page that described it, which looks like this:
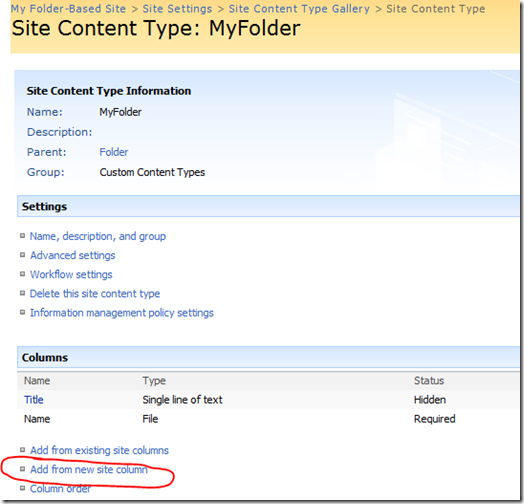
Notice there's a link to add a new Column. Click this and we'll add the Description Field/Column, as below:
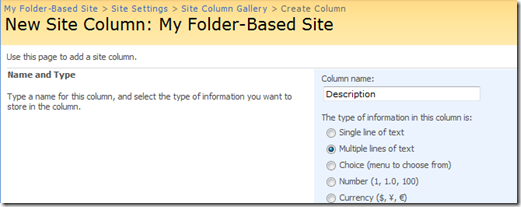
Once you've clicked Ok on that page your custom Folder is ready for use.
Step 3. Create a new List to contain your Folder
Now we have a new Content Type we need to create and configure a new List that will use it.
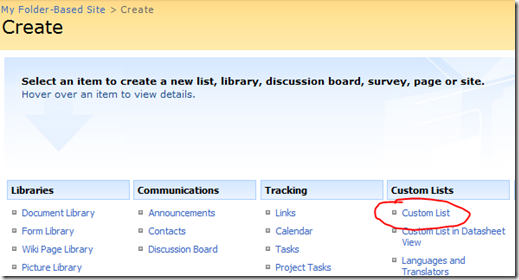
From the main Site Actions menu choose the Create option and then choose "Custom list" from the next page, as below:
Call your new List something like MyFolders or MyMedia, or whatever:
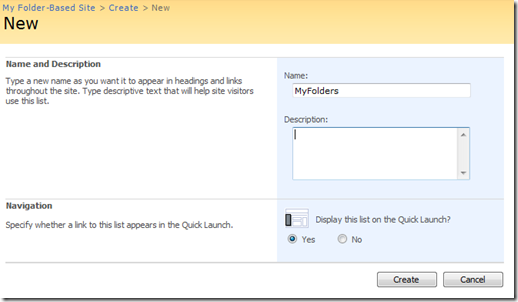
You'll then be taken to your new empty List.
Step 4. Configure The List To Show Your Folders
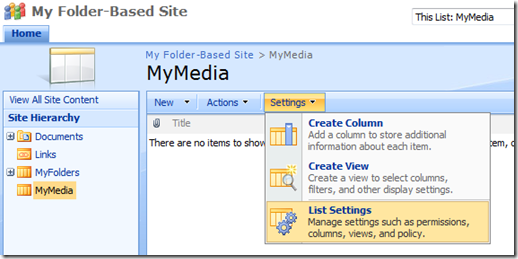
From this Settings menu on the new List, choose List Settings.
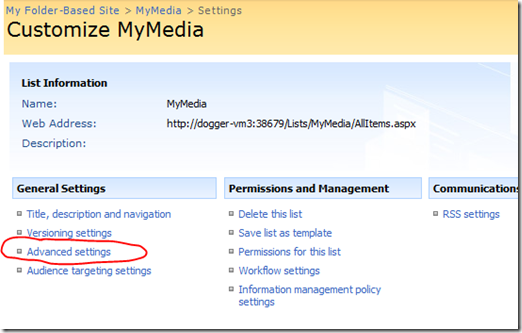
On the next page choose Advanced Settings:
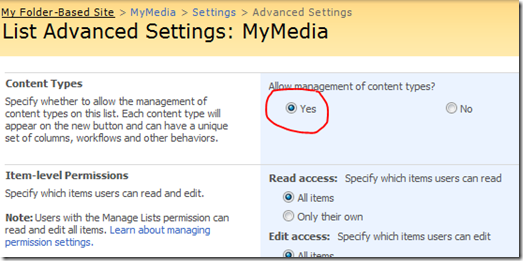
On the Advanced Settings page you then need to enable the management of Content Types:
When you click Ok you'll return to the previous page and see the Content Types section, which wasn't there before:
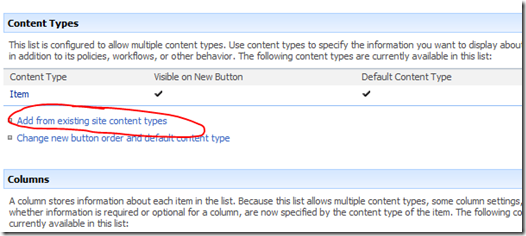
In that section click on "Add from existing site content types" and in the next page add your MyMedia/MyFolder Content Type, so that the Content Types section then looks like this:
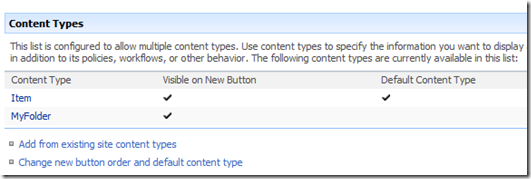
Now return to the List and you'll see that under the List's New menu there's an option to create a new "MyFolder" entry. Click this and you'll see a screen like this:
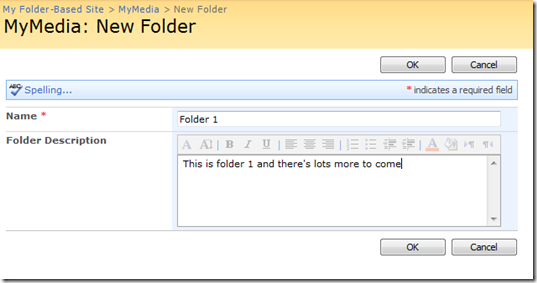
It's just like the standard "New Folder" page, but, this one lets you add a description to it.
Here's the result of pressing Ok - a new folder in your List.
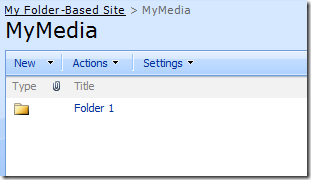
And breath....
That was the easy bit. Getting this far I found fairly "straight-forward". What I then wanted to do was show the folder's description while navigating the List.
Step 6. Displaying the Folder Description
After a couple of days of trying to find a simple solution to this I finally opted to create my own Web Part. To do this I used the WSPBuilder plugin for Visual Studio, which I am running on the same Virtual Machine on which MOSS 2007 is installed.
First off, from within Visual Studio, I created a new WSPBuilder project:
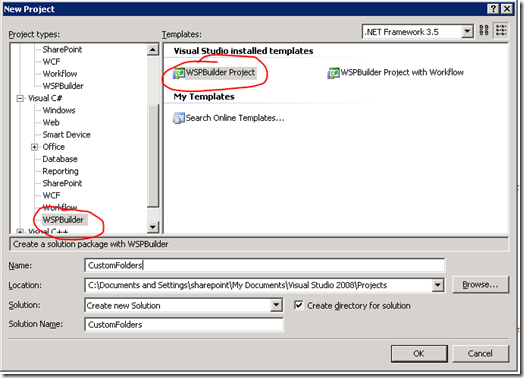
Once the project was created I added a new item to it based on a Web Part and called it "ShowMyFoldersDescription":
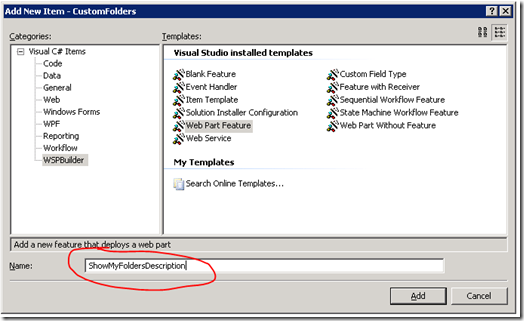
Visual Studio will then create all the files you need to deploy this Web Part and in the required structure, as you can see below:
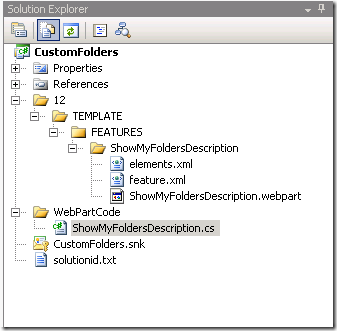
The file we're interested in is the .CS file. Open that and find the CreateChildControls() method and the bit where it says "Your code here". This is where we'll add the following code (be sure to add a "using Microsoft.SharePoint" statement at the top of the code file first):
SPWeb web = SPContext.Current.Web;

//Find the folder item for the current page.
string rootFolder = Page.Request.QueryString["RootFolder"];

if (!String.IsNullOrEmpty(rootFolder))
{

        SPFolder folder = web.GetFolder(rootFolder);

        if (folder.Exists && folder.Item.ContentType.Name == "MyFolder")
        {

                base.CreateChildControls();

                this.Style.Add(HtmlTextWriterStyle.Margin, "1em");

                this.Controls.Add(new LiteralControl("<h2>"+folder.Name+"</h2>"));

                SPField field = folder.Item.Fields["Folder Description"] as SPField;
                this.Controls.Add(new LiteralControl(field.GetFieldValueAsHtml(folder.Item["Folder Description"])));

        }
        else
        {
                this.Hidden = true;
        }
}
else
{
        this.Hidden = true;
}
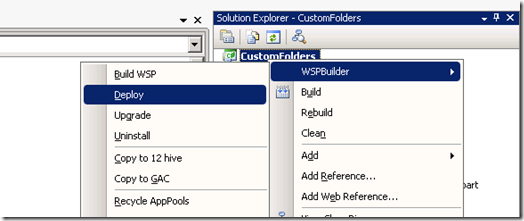
With the code in place you can build the project and then, if you right click the project you'll see a WSPBuilder menu. In there you can build the WSP and then Deploy it to the server, like so:
Now it's deployed on the server, we need to enable and add the new Web Part to our page. Switch back to the Site in your browser and from the Site Settings page choose the Site Features link from under Site Administration. Scroll down the list of Features until you see the one we just created and then click to Activate it, so an Active flag appears next to it, as below:

Now return to your List and from the Site Actions menu choose Edit Page:

This will put the page in edit mode and allow you to add the new Web Part to it. Click the Add Web Part button on the page and then choose the "Advanced" option from the window that pops up. You'll see a screen like the one below:
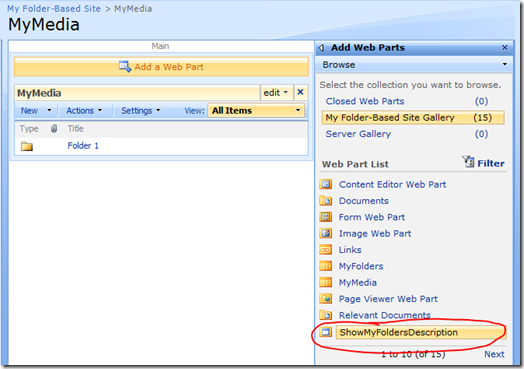
Notice the Web Part we just activated appears in the list. Cool! Click and drag it over to where you want it to appear in the List page. You should see a live preview of what it will look like:
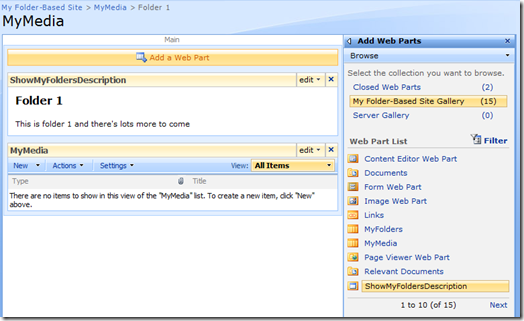
Just below the Site Actions menu there'll be an "Exit Edit Mode" button. Click that and you'll return to your List, but, low and behold, it will have the Folder's description appear as you navigate around. Phew!
Summary
Such is the nature of learning SharePoint that achieving something so apparently simple can bring such relief that I punch the air with joy.
For two or three days (yes, days!) while I struggled to work out how to do this I'd been ending my working day with a feeling of dejection, having wasted a whole day in which I'd achieved nothing. I hate days like that. Hence my exhilaration when arriving at a working solution.
I'm not saying this is the only or - by any means - the best approach to take. Heck, who am I to say that, having only been using SharePoint for about a week. For now though I'll assume it is the only way and that what I've described might one day be of use to somebody and save them the pain I've just been through.
O_o
That seems an extremely long winded way of going about that process. I hope that there is an easier option that you still haven't discovered during your learning, because if everything is as complicated as that in SharePoint then I can see why companies need so many SharePoint developers, whereas they only need one or two Domino developers.
Reply
Wow. Just wow.
Reply
i call Sherepoint "Lostpoint". :)
Reply
... or Sharepain.
.::AleX::.
Reply
I think that this is object proof to any developer as to why one shouldn't really even touch this stuff.
If it's this hard to add that one little piece to an existing application, what happens when someone wants to build a real application that *does* something?
It's possible, however, that starting an app "from scratch" is actually easier than modifying the MS-provided defaults, and all this "hard" stuff comes from trying to bend the inflexible. You should see how hard it is to pipe an aspx from scratch in C# through the SP server. I'm curious as to whether that makes things any easier.
Reply
Why not press Site Action -> Edit Page, and then press "Add a Web Part". Select "Content Editor Web Part" (under category "Miscellaneous"). Could that solve your challenge?
Reply
No, that won't solve it. That just adds hard-coded text to all folders.
Reply
Hi Jake... this sort of pain would be eased if only wss3/moss2007 had the client object model like sp2010... but congratulations that you reached the stage of sp web part dev in such a short time. Looking forward to your new findings:)
Reply
Well, I think that Microsoft did quite a good job in migration of filesystem into something else. And add a folder description on filesystem in probably impossible ;)
This is the problem of SharePoint - it is so easy for some time and then is the barrier. It is just hard to tell before, where it is.
Reply
When I worked for the U.S. Navy, the detachment I worked for was going to replace all Lotus Notes web applications with Sharepoint ones. This initiative started about 5 years ago and they still are running the Domino server and web apps I worked on back then. As we were researching SHarepoInT I encountered much the same headaches that you are experiencing. NOTHING is easy if you need to do something other than what you get out of the box. You've got to love being a code monkey to get anything simple accomplished.
The other thing that Domino does so well is being able to have a DEV and PRODUCTION environment with an easy way to transfer/sync design elements. Imagine trying to move all the code you've done here to a production box and keep it in sync. Not nearly as simple as clicking "Design Reresh"...
I've since moved on from the Navy and am now working with ColdFusion and often wish for the good old days of working with Domino :)
Reply